Showing posts with label Favorites. Show all posts

Saturday, January 18, 2025

Recipe: Norwegian Tartlets


Printer friendly icon
Norwegian Tartlets 

Crust
1 stick butter (1/2 c.)
3 T. granulated sugar
1/4 t. salt
1 - 1/4 c. flour (perhaps a few teaspoons more)

Crust Directions
  1. Preheat oven to 350 degrees Fahrenheit (325 convection; 175 degrees Celsius).
  2. Using a food processor or stand mixer, blend butter, sugar, salt, and flour until thoroughly mixed. Mixture will be crumbly.
  3. Press crust crumbles firmly into tart tins in a layer 1/4-inch (.635 cm) thick.
  4. Bake at 350 degrees for 12-14 minutes. Tartlets may not look done; they are not supposed to brown, but just barely start to turn golden. Cool on wire rack.

Cream Filling
8 oz. cream cheese, room temperature
14 oz. can sweetened condensed milk
1/3 c. lemon juice
1 t. pure vanilla extract
1 can or 1 recipe blueberry pie filling (or fruit pie filling of your choice)

Filling Directions
  1. Using a food processor or stand mixer, whip cream cheese, sweetened condensed milk, lemon juice, and vanilla extract together until smooth.
  2. Place about 2 T. of cream filling into each cooled tartlet crust.
  3. Finish with a 1 t. dollop of pie filling (with at least 2-3 blueberries) on top of cream filling.
Makes 12-16 tarts.
 
Cook’s Note: This recipe makes more filling than crust; you can double the crust recipe or store leftover filling in fridge for up to a week.

The recipe title is a bit of a misnomer. I bought tart tins at an antique store in Idaho and found a Norwegian tart crust recipe online. However, the filling is decidedly not Norwegian according to my friend's foreign exchange student from Norway—though the foreign exchange student did think the tarts were delicious. Maybe this recipe should be named Norwegian-ish Tartlets?

Friday, April 14, 2023

Recipe: Mama Alana's Easy Lasagna


Red Sauce Ingredients:

2 - 15 oz. cans petite diced tomatoes (or crushed tomatoes)

2 - 15 oz. cans tomato sauce

6 oz. can tomato paste

1/2 T. dried minced onion

1 t. minced garlic

1/2 T. oregano

1/4 t. fennel seed

1/4 t. marjoram

1/8 t. thyme

1/8 t. rosemary

salt and pepper to taste


Final Filling Sauce:

1 batch Red Sauce (above)

6 oz. dr. wt. can olives, sliced

16 oz. regular ground sausage, browned

16 oz. large curd cottage cheese


1 box oven-ready lasagna noodles (Great Value is good)

2 lbs. shredded cheese

 
Directions:

  1. In a pan or crockpot, mix Red Sauce ingredients and simmer 30 minutes - 2 hours on low, stirring occasionally.
  2. Brown sausage and drain.
  3. Add olives, browned sausage, and cottage cheese to Red Sauce and stir until just mixed.
  4. Spoon a thin layer of Final Filling Sauce in bottom of 4 qt (9" x 13" or 10.5” x 14.75”) casserole dish so noodles don’t stick and burn to the bottom. Layer dry lasagna noodles on top of filling, breaking noodles to fit in dish with 1/4” - 1/2” gaps between noodles. Add filling layer 1/2” - 1” thick. Repeat layering noodles and filling until filling is gone. Do not put dry noodles on top of final layer of filling.
  5. Cover with shredded cheese. (To prevent cheese from burning, cover casserole dish with foil for the first 30 minutes of baking time.)
  6. Bake at 350 for 40-45 minutes, or until fork easily pierces lasagna to the bottom of the casserole dish. Let stand for 5-10 minutes before serving. 
Note: Top layer should not come higher than 1/2” from the top of the casserole dish. Do not overfill casserole dish because lasagna will bubble and overflow. For extra flavor, double the amounts of fennel, marjoram, thyme, and rosemary; if herbs are not simmered for at least 30 minutes, filling will have patches of bitter flavors.

Friday, September 24, 2021

Recipe: Sticky, Chewy Caramel Corn

Sticky, Chewy Caramel Corn

by Heath Lee


2 c. brown sugar, packed

1 c. butter

1⁄2 c. corn syrup

1 t. vanilla

20 c. popped popcorn (microwavable)


Combine first 3 ingredients in a saucepan and bring to a boil; boil for 5 minutes. Remove from heat and stir in vanilla. Pour over popcorn, stirring until thoroughly blended.


Cook’s Note: Heath’s trick is to use microwave butter popcorn because it adds a burst of butter flavor. You know you want to make some!

Shake unpopped kernels from bag...

...before opening the bag.

Start with microwave popcorn, butter flavored.

Pour, stir unto coated evenly, and enjoy.


Recipe: Cream Cheese Buttercream Frosting

Cream Cheese Buttercream Frosting

8 oz. cream cheese, cold

1/2 c. butter, room temperature (not melted)

2-3 c. powdered sugar

1 t. vanilla

1/4 t. to 1/2 t. almond extract, optional


Instructions:

  1. In a KitchenAid or using a hand mixer, beat cream cheese and butter until smooth. (You won't be able to beat the lumps out once you've added the powdered sugar.)

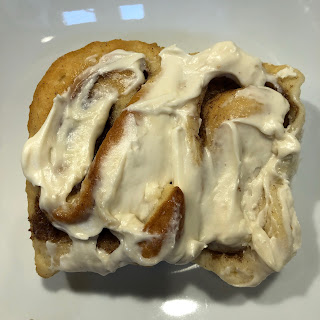
  2. Add powdered sugar 1 c. at a time. (For already sweet desserts, like cinnamon rolls, I only use 2 c. powdered sugar; if you're frosting something, and you want the frosting to be the main hit, use closer to 3 c. powdered sugar.)

  3. Mix in vanilla (and optional almond extract).*

*I like to add almond extract for frosting sugar cookies, sugar cookie bars, and cupcakes. I do not add almond extract if I'm frosting cinnamon rolls.


Buttery Cream Cheese Buttercream Frosting

4 oz. cream cheese, cold

1/2 c. butter, room temperature (not melted)

2-3 c. powdered sugar

1 t. vanilla

milk (optional)


Beat cream cheese and butter together until smooth. Add powdered sugar and mix well. Mix in vanilla.


Cook’s Note: If using this on top of cinnamon rolls, you can add a few drops of milk to reach desired consistency.


Wednesday, September 1, 2021

Recipe: Peach Dessert

This recipe comes from my husband's Aunt Lanita who passed just before she would have turned 41. From what I hear, she was an excellent cook and baker, and until this post, I'm not sure this recipe ever existed on the internet. It's about time, because y'all have been missing out! This is a real crowd pleaser.

This is my hubby's favorite dessert (besides pecan pie). It is a no-bake layered dessert that requires a minimum of 2 hours of refrigeration and a decent amount of self-control.

Aunt Lanita's Peach Dessert

Crust

1/2 c. salted butter, melted

3 pkgs. graham crackers, crushed


Instructions:

1. Crush graham crackers in food processor; slowly add melted butter. Optional: reserve 1/4 c. to sprinkle on top of finished dessert. 

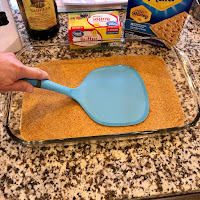
2. Press crust into 13x9 casserole dish. Set aside.


Creamy Whip

8 oz. cream cheese, softened

2 pkgs. Dream Whip, no substitutes

1 cup milk

1/2 t. vanilla

1/2 c. powdered sugar


Instructions:

1. Beat cream cheese until smooth; set aside.

2. Beat Dream Whip, milk, vanilla, and powdered sugar until it has a whipped consistency. Fold in cream cheese; mix until thick and smooth.

3. Spread 1/2 of mixture onto crust; reserve remaining half.


Fruity Jello Layer

2 c. water

3/4 c. sugar

2 T. cornstarch, heaping

1 small pkg. (3 oz.) orange Jello

4 c. sliced peaches, with skin removed (fresh is best)


Instructions:

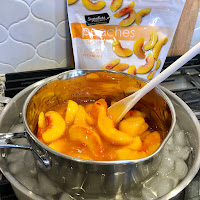
1. Combine water, sugar, cornstarch, and jello; cook until thickened, about 2 minutes. Cool (in refrigerator or ice bath).

2. To prepare fresh peaches, blanch in boiling water, place in ice water, and remove skin. Slice thinly.

3. Once mixture is cooled, but not fully set-up, stir in 4 c. of sliced peaches until mixed. 

4. Spoon fruity jello mixture on top of creamy whip layer and smooth out.

5. Spoon remaining half of creamy whip onto fruity jello layer and smooth out. (It is a little easier to spread if the fruity jello layer has set up some, but either way works and tastes delicious.)

6. Optional: Sprinkle reserved portion of crust onto top layer of creamy whip.

7. Refrigerate for at least 2 hours.


Cook's Note: This recipe is time consuming, but is worth the toil. You can also switch out the fruit and jello flavors, for example, with fresh raspberries and raspberry jello. I've tried peach jello, and trust me, orange works best.


Shown with optional graham topping

Sunday, February 9, 2014

Recipe: Spicy Buffalo Chicken Dip

16 oz. cooked chicken (shredded) or canned chicken
8 oz. pkg. cream cheese, softened
1/4 - 1/2 c. ranch dressing (I prefer the lesser amount)
1/3 c. "Frank's Original Hot Sauce"--no substitutions
Bag of your favorite tortilla chips

Crockpot directions:
Combine all ingredients in a crockpot and heat on low, stirring every 10-15 minutes until dip is warm (may take 45 minutes depending on your crockpot). Set temp on "warm" when serving at parties.
 
Microwave directions:
Combine all ingredients in a large bowl, preferably glass. Heat in microwave on high for 3 minutes or until mixture is heated evenly. Stir halfway through heating time.


Serve with tortilla chips.

Thursday, February 25, 2010

Better-Than-Tollhouse Chocolate Chip Cookies

Ingredients:

1 c. butter, softened
3/4 c. sugar
3/4 c. brown sugar, packed
1 t. vanilla
2 large eggs
2-3/4 to 3 c. all-purpose flour
1 t. baking soda
1 t. salt
Chocolate chips

Mix butter, sugar, brown sugar and vanilla. Add eggs one at a time, beating thoroughly. Add soda, salt and 2 cups flour and mix. Add remaining flour 1/4 c. at a time until desired consistency is reached (dough should be slightly tacky when you touch it, and little or no dough should remain on your finger if you touch it). Stir in chocolate chips.

Bake 9-11 minutes at 375 degrees.

I like to use milk chocolate chips and Heath toffee bits. So yummy.

Friday, February 20, 2009

Recipe: Vita-Mix Bread Doubled in a KitchenAid


My dad was the Director of Marketing for Vita-Mix after years of making countless loaves of bread as a pitchman at fairs and other conventions. He's baked more bread than I can count. I love the taste of Vita-Mix bread, so I set out to create a recipe with a similar taste and texture that can be made in a KitchenAid or other stand mixer.

I love this bread recipe, especially if I just want white bread. I usually substitute about 2/3 of the bread flour with whole wheat for a healthy version. (See Cook's Note.)

Vita-Mix Bread Doubled in a KitchenAid

by Alana Lee


Ingredients: 

2 T. active dry yeast (1 pkg.)  

2-1/2 c. warm water

2 T. oil

1/4 c. gluten flour (can be omitted)

5-6 c. bread flour (or all-purpose flour)

2-3 T. sugar

2 t. salt


Directions: 

1. Preheat oven to 350 degrees. Grease two 8-1/2 x 4-1/2 x 2-1/2 inch bread pans; set aside.

2. Place yeast and water in kitchen aid bowl. Proof 2-5 minutes. Once yeast mixture gets bubbly, add oil.

3. Add 4 c. flour, the salt, and the sugar. Mix using dough hook. Add more flour 1/2 c. at a time, as needed until dough reaches desired consistency. Knead just until dough forms a ball around dough hook and cleans the sides of the mixing bowl (the very bottom of the dough should still stick to bottom of bowl).

4. Shape dough into two equal loaves and place in greased bread pans. Cover with greased plastic wrap. Allow dough to rise in a warm place (like on a heating pad or warm oven) until the sides of the dough come to the top of the pan, about 20-30 minutes. The dough should nearly double in size.

5. Bake for 35-40 minutes. The top of the loaf should be a medium golden brown. If you knock on the top of the loaf once removed from the pan, it should sound more hollow than dense.

Cook's Note: The gluten flour makes your bread stay spongy for many days longer, like store-bought bread. It doesn't change the taste, it just keeps it from getting hard as fast. It also increases the protein content of your bread. For whole wheat, I use about 4 cups of whole wheat flour and 1-2 cups of bread flour. The ratio can be adapted according to your preferences. 


Loaves in pan and ready for 2nd rise.


Tiny Clarification

Here is the original recipe, which is owned by Vita-Mix and appeared in the 1993 cookbook The Versatile Vita-Mix


As you can see, my recipe is my own and is therefore not owned by Vita-Mix or their historical owners. Vita-Mix bread dough includes egg and is much more moist so that it can be easily flattened and pressed into a bread pan using a spatula, which gives it a slightly different texture than my recipe. This "doubled for a KitchenAid" recipe kneads well with a dough hook and has a better moisture content to knead by hand to form loaves for bread pans.